Configure the OpenVPN Client and Connect to your OpenVPN Server
Once the client is installed, navigate to c:\Program Files\OpenVPN\Config.
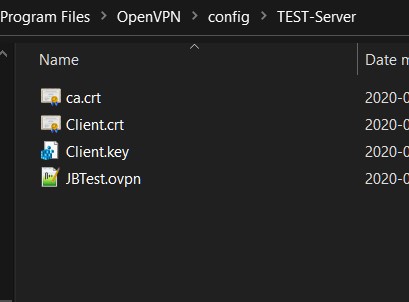
Your OpenVPN server administrator should have provided you with the required certificates and config file to connect to the OpenVPN server, they should include files like the ones in the screenshot below.

The .ovpn file is OpenVPN’s configuration file which looks like this:
# Is this end the client or the server
Client
# VPN device Type tun/tap
dev tun
# Protocol to communicate over
proto udp
# VPN Server address & listen port
remote myvpnserver.work.org 1194
# Keep retrying forever in case of connection failure
resolv-retry infinite
# Do not bind to local address and port.
nobind
# Don’t re-read key files across SIGUSR1 or –ping-restart.
persist-key
# Don’t close and reopen TUN/TAP device or run up/down scripts across SIGUSR1 or –ping-restart
restarts.
persist-tun
# Take the TUN device MTU to be n and derive the link MTU from it (default=1500).
tun-mtu 1500
# Path to VPN Server certificate authority Certificate
ca "ca.crt"
# Path to this VPN Clients Authentication Certificate
cert "Client.crt"
# Path to this VPN Clients private key
key "Client.key"
# Compress VPN Traffic
comp-lzo adaptive
#Log Verbosity
verb 3
Place these files in the c:\Program Files\OpenVPN\Config directory, all in the same directory. Open the ovpn config file and ensure that for the ca, cert, and key parameters, there are no paths specified, just the filename.
Once that’s done, launch the OpenVPN Gui. An icon like the one in the image below will appear in your notification tray.


Right-Click on that icon and click on Connect to connect OpenVPN.

Once the icon turns green, OpenVPN is connected!


[…] Learn How To: Configure an OpenVPN Client […]
backlink with wiki link
jyavfmsjy hfixh ambleva hvbn lihffxxghmhlggj